Dealing With Sun Flare
We all love a good, glowing look to our photos but when does it become a little too much? Like any effect, moderation is key. When sun flare is overused or poorly executed, it can distract from the intended focus of the photo and detract from its overall quality. Let’s take a second to talk about sun flare.
What is Sun Flare?
Ah yes, that elusive burst of light in a photograph, can add a whimsical touch, infusing images with warmth and charm. It’s the photographic equivalent of catching a glimpse of sunlight through leaves or the soft glow of a sunset.
Basically, it’s when the sun hits your lens and gives you a little too much of the beautiful light you’re looking for. While it can lend a beautiful, warm look to your images, sometimes you don’t want the lifted shadows, lack of contrast or slightly orange tint.
To help combat sun flare, you can use a lens hood or, if you don’t have one with you, cup your hand around the lens on the side the sun is entering from. This gives you more control on reducing the haze of the direct light hitting your lens. Typically, you can visually see the difference through your viewfinder right away. When the direct light is correctly blocked, your view becomes much clearer and your shadows deeper. When you remove the block (by a lens hood or your hand) you’ll notice much softer, lifted shadows, and a gentle haze across the image.
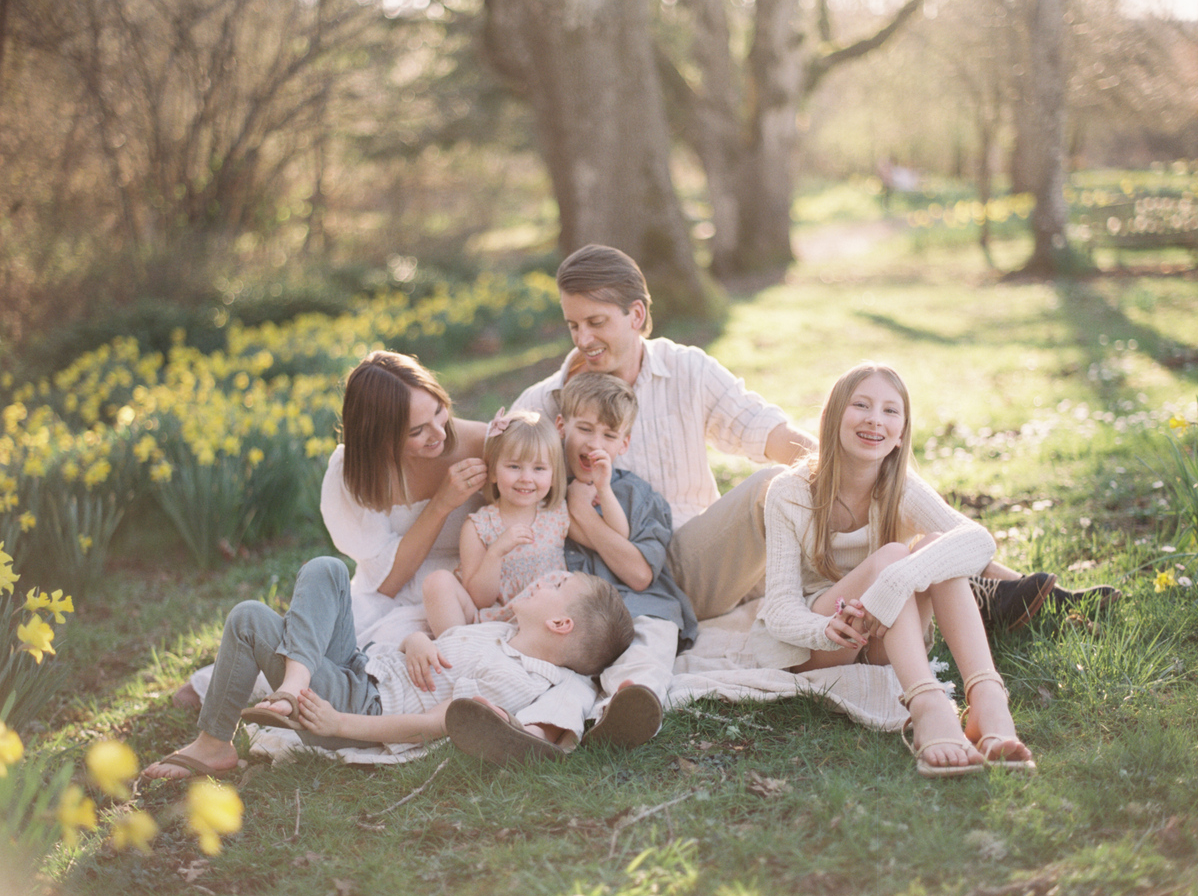
In the photo below, Alexandra Grace Photography showcases a dreamy, sun flared photo with no redirection of light hitting her lens. The sun’s just doing its thing, casting this magical glow all around, and there’s Alexandra, capturing the moment with finesse. No fancy maneuvers with redirection or anything, just letting that natural light work its magic. It’s like catching a glimpse of a fairytale come to life, right there in the frame.

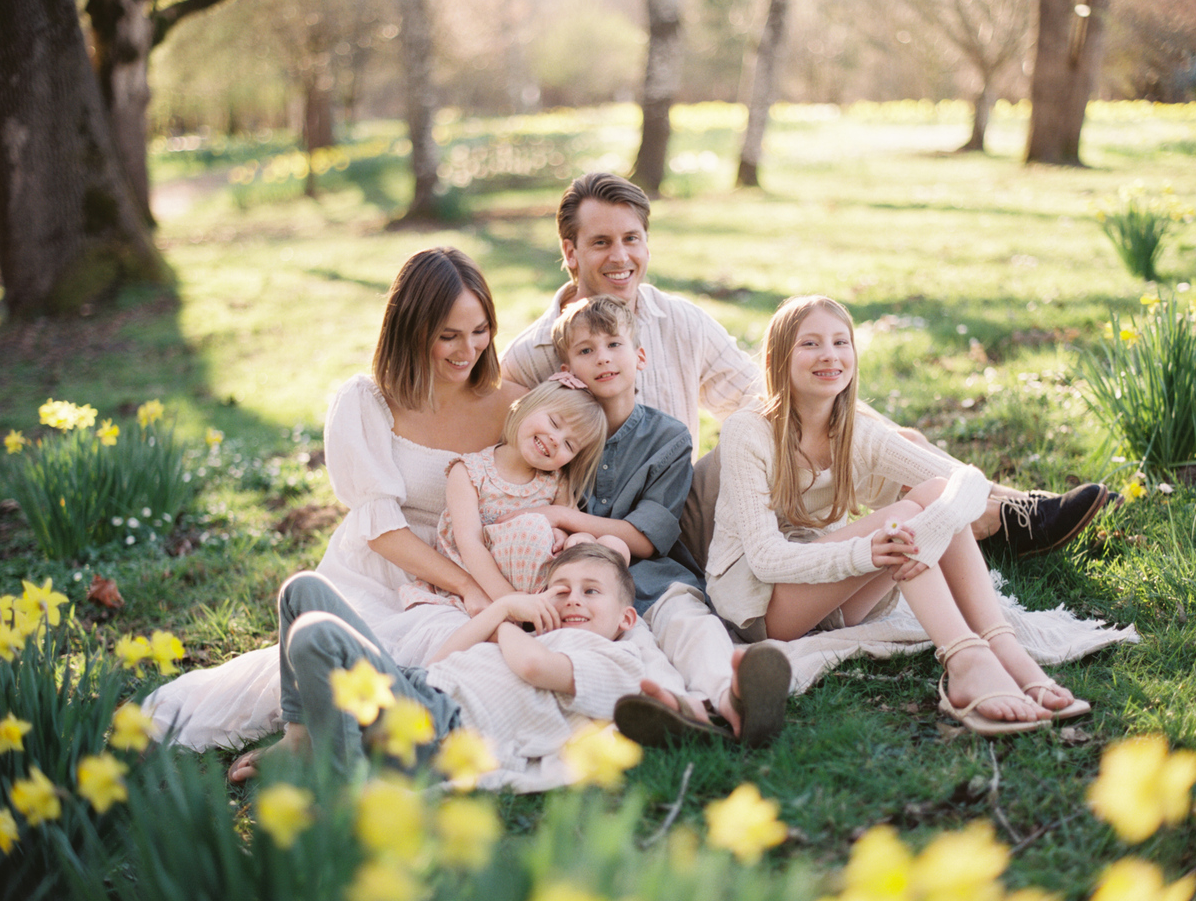
In this next photo, taken just seconds from the first, Alexandra repositioned herself just a few steps over to use the natural tree line to block the direct sun. Visually, you can see the immediate difference in contrast. You would actually see this in camera as well, in real time.
The image becomes crisper, shadows more defined, and the details are clear. It’s like a before-and-after right in front of your eyes! The contrast pops and suddenly, everything gets this extra punch of clarity. Shadows, they’re like, “Hey, here I am!” all defined and sharp. Oh, and all those tiny details? Oh boy, they’re out in full force, no hiding in the background anymore. It’s like the whole picture wakes up and says, “Hey, world, check me out!”

Mastering these techniques can be a powerful tool in a photographer’s arsenal. Whether aiming for a soft, dreamy aesthetic or a crisp, clean look, understanding how to harness sun flare can elevate images and add depth to your storytelling.
Familiarizing yourself with these techniques takes a bit of practice, and experimentation, but once you see it through your viewfinder, it’s easier to manipulate the natural light to get the look you’re going for.
Whether you’re going for soft and dreamy or crisp and clean, knowing how to use sun flare techniques to your advantage is definitely a skill you’ll want to have in your back pocket.
How do you deal with sun flare?
Pin This!