
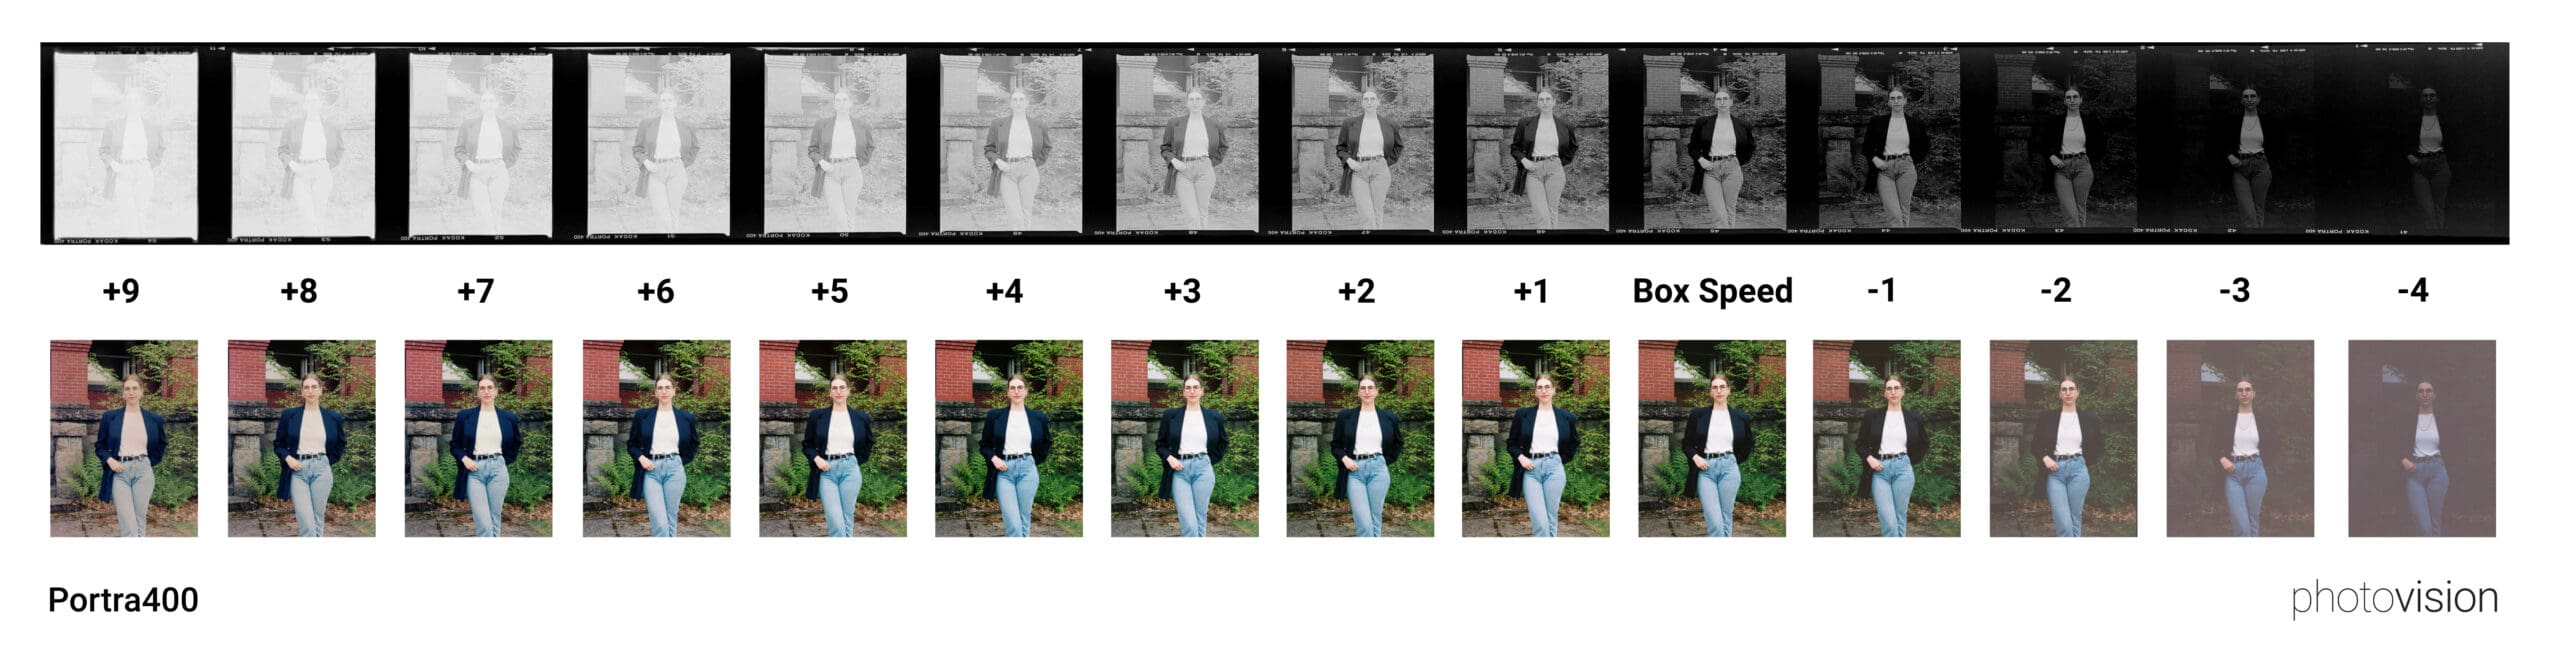
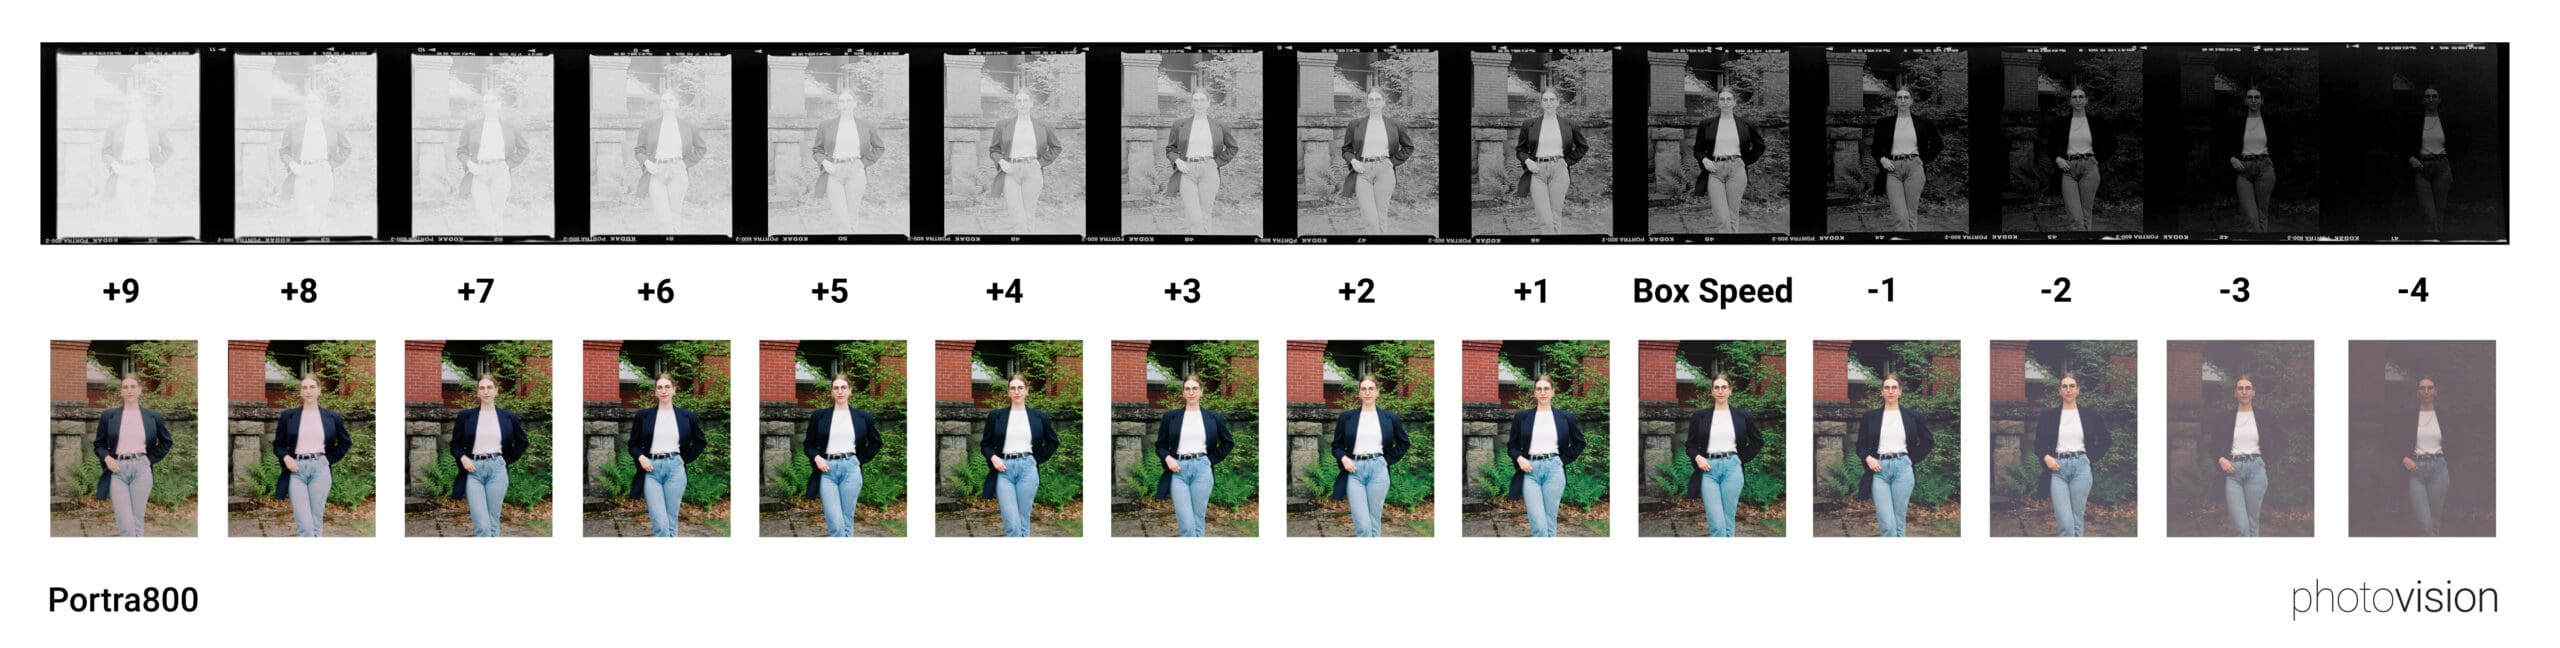
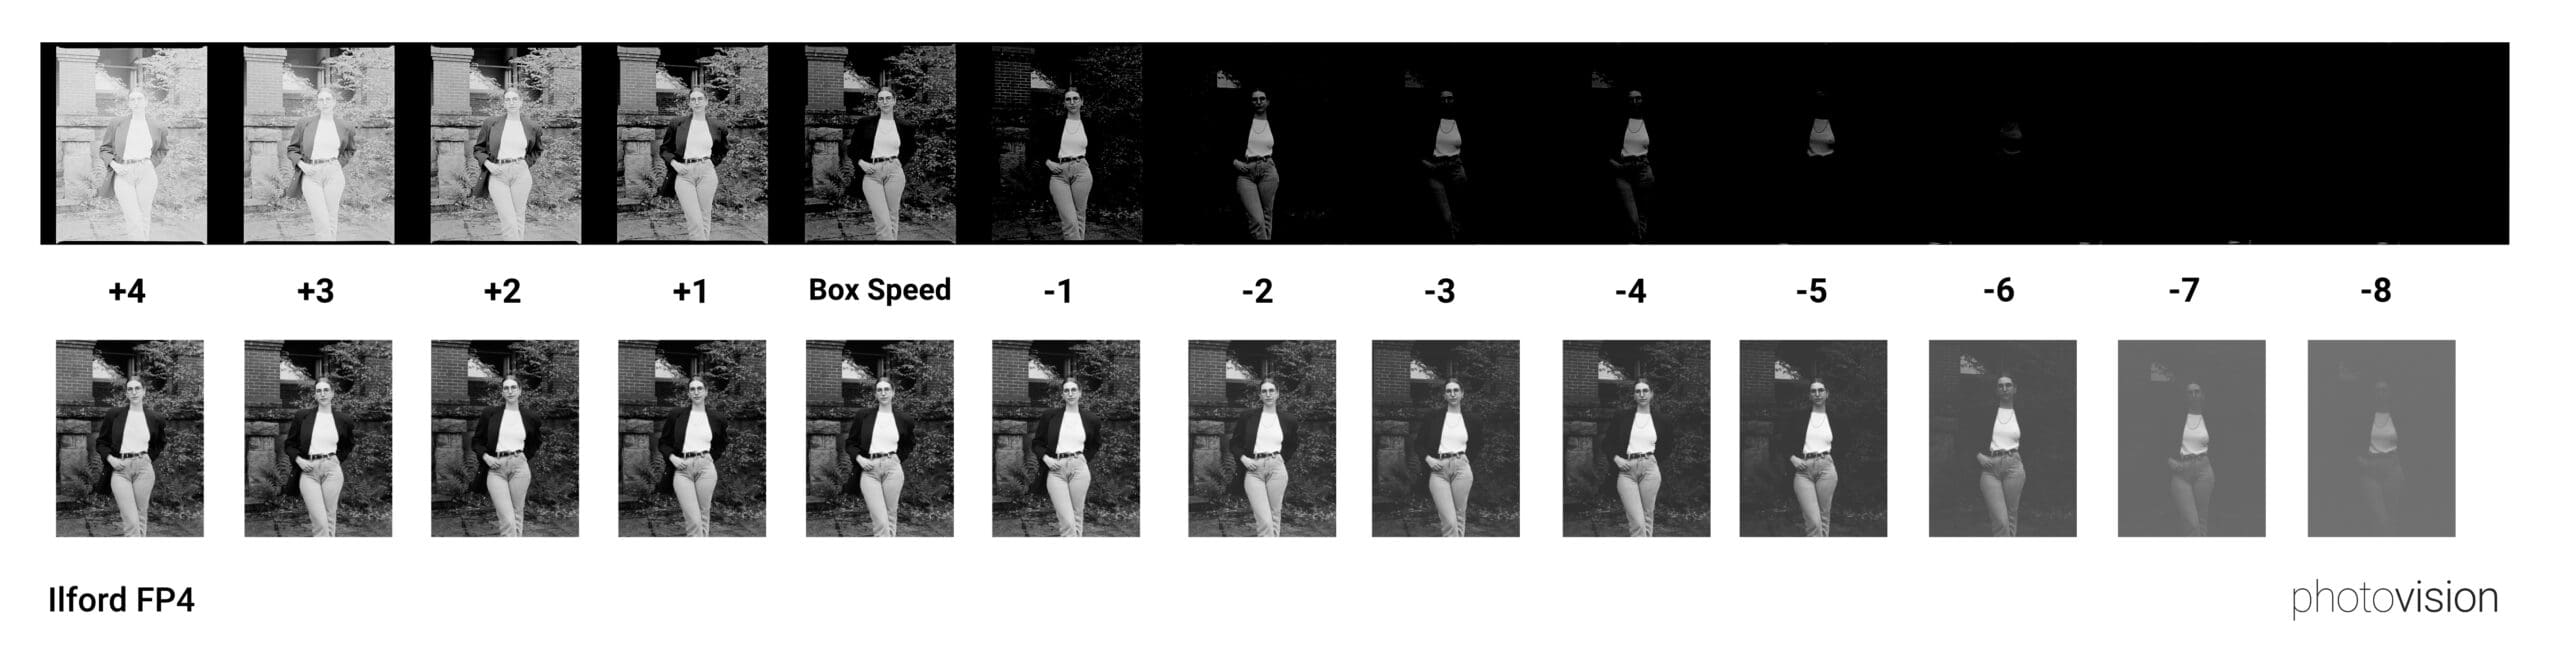
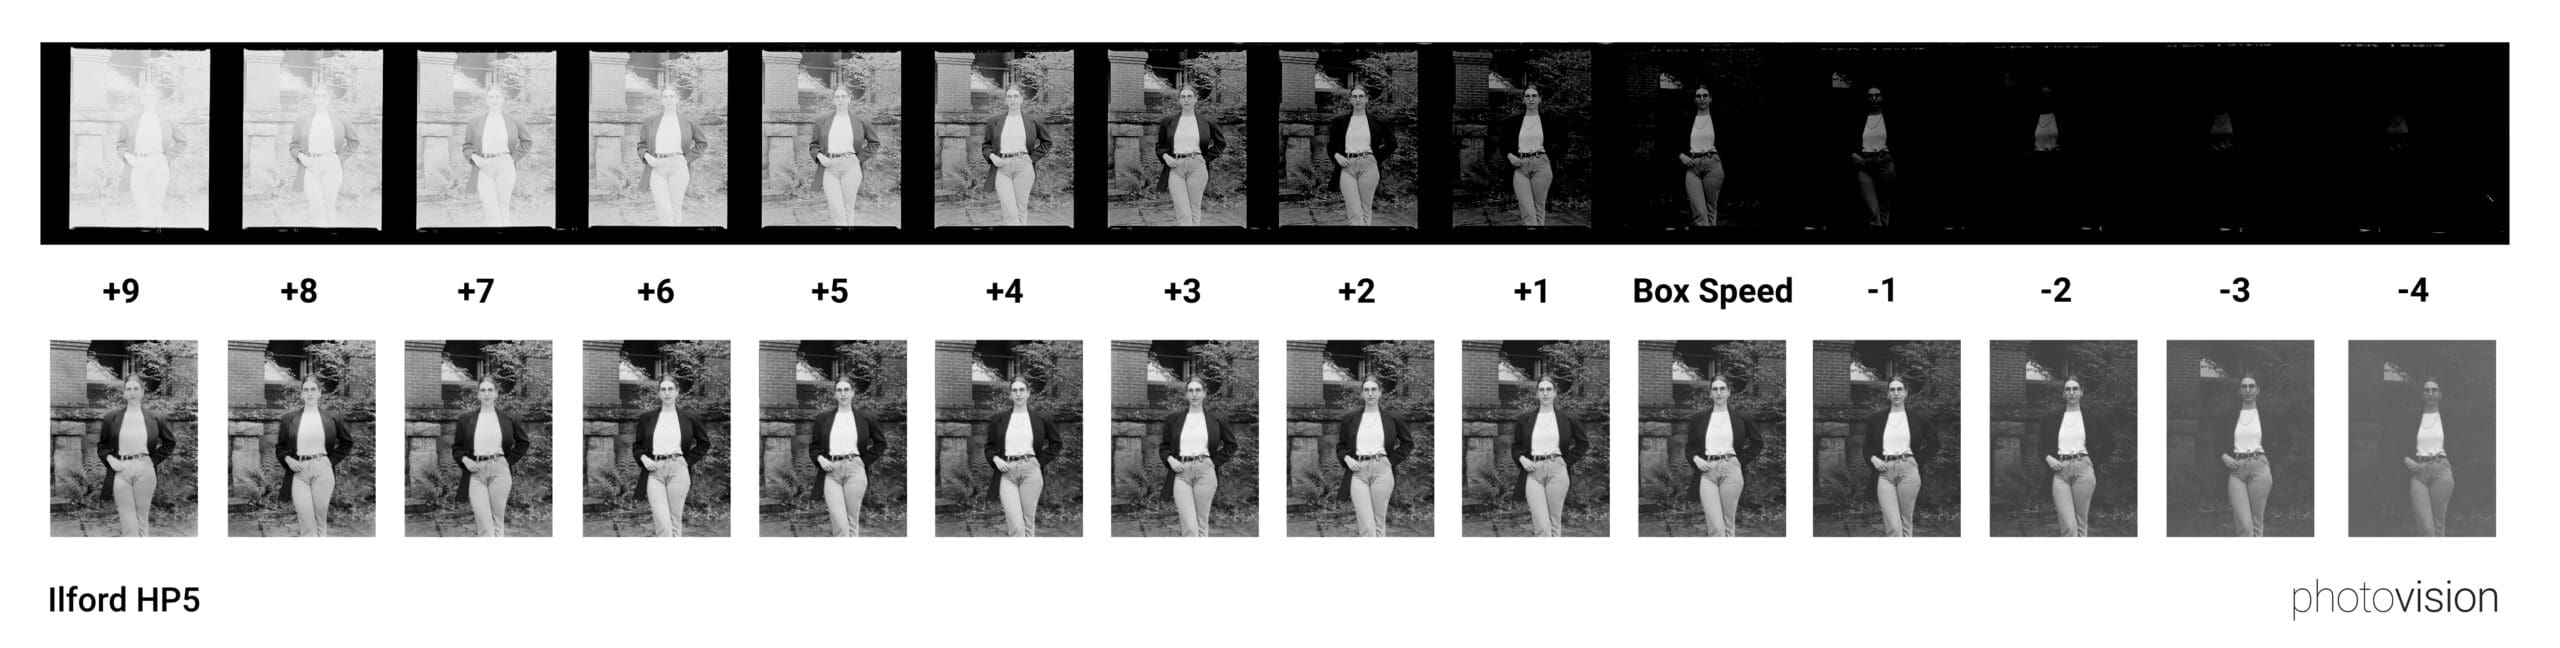
If you are new to film, transitioning to a new film stock or just haven’t been happy with your exposures, we have a solution that will save you time, money and energy in achieving your ideal scans—exposure ramps. Exposure ramps help you learn a film stock’s characteristics, and exposure latitude and allow you to dial in on the best exposure for you!

Making an Exposure Ramp
- Select your subject and pick an environment you photograph in often.
- Set your aperture at f/11 or higher to ensure you can create a ramp with your box speed rating somewhere in the middle. (For the ramp above of Portra400, we shot at f/16.)
- Take a meter reading at the film’s box speed and write it down to reference later. (If your camera does not imprint exposure data note which frame is shot at box speed.)
- Start shooting! Begin at your camera’s fastest available shutter speed and work your way down to your camera’s slowest speed in one-stop increments.
Tips for a Successful Exposure Ramp
Be Sure to Shoot Skin Tones!
You can even ask a friend to model for you. Skin tones can shift dramatically depending on your exposures, and your clients just want to look good, right? Be sure your subject fills at least ⅓ of the frame so you can clearly see how each exposure renders their skin tone.
Lighting is Everything.
Shoot your ramp in consistent lighting in an environment you photograph in often. Consistent light, for the most part, means consistent contrast. Having a consistently lit scene will help you decipher how exposure affects the contrast in your negative, rather than a shift in lighting.
Use a Tripod!
No but really, use a tripod. In order to test severe overexposure, your shutter speed will be seconds long. Use a tripod to mitigate camera shake and ensure consistent framing of your subject.
Things to Look for When Studying Your Exposure Ramp
Now it’s time to decide which exposure fits your aesthetic best! You’ll do this by studying your ramp.
Where Do You See the Most Detail in Each Exposure?
The highlights, shadows, midtones? Knowing where you want the most detail within your frame will help you determine what your exposures should be.
Where Do You See Color Casts?
Every film stock starts to show color shifts in either the highlights (when overexposed) or shadows (when underexposed). Take note of when and where those color shifts start to emerge to have a better understanding of that film stock’s exposure latitude.
Are There Any Camera Issues?
When creating an exposure ramp, you are pushing your camera to its limits— especially when it comes to your shutter. Use this exposure ramp experiment to see how your camera handles faster shutter speeds like 1/1000 or 1/4000. If you begin to see shutter issues, such as two frames that appear to be the same exposure when you know they’re not, you’ll know which shutter speeds to avoid in the future. Studying the density of each frame of your Exposure Reference Sheets will help you to spot this problem.
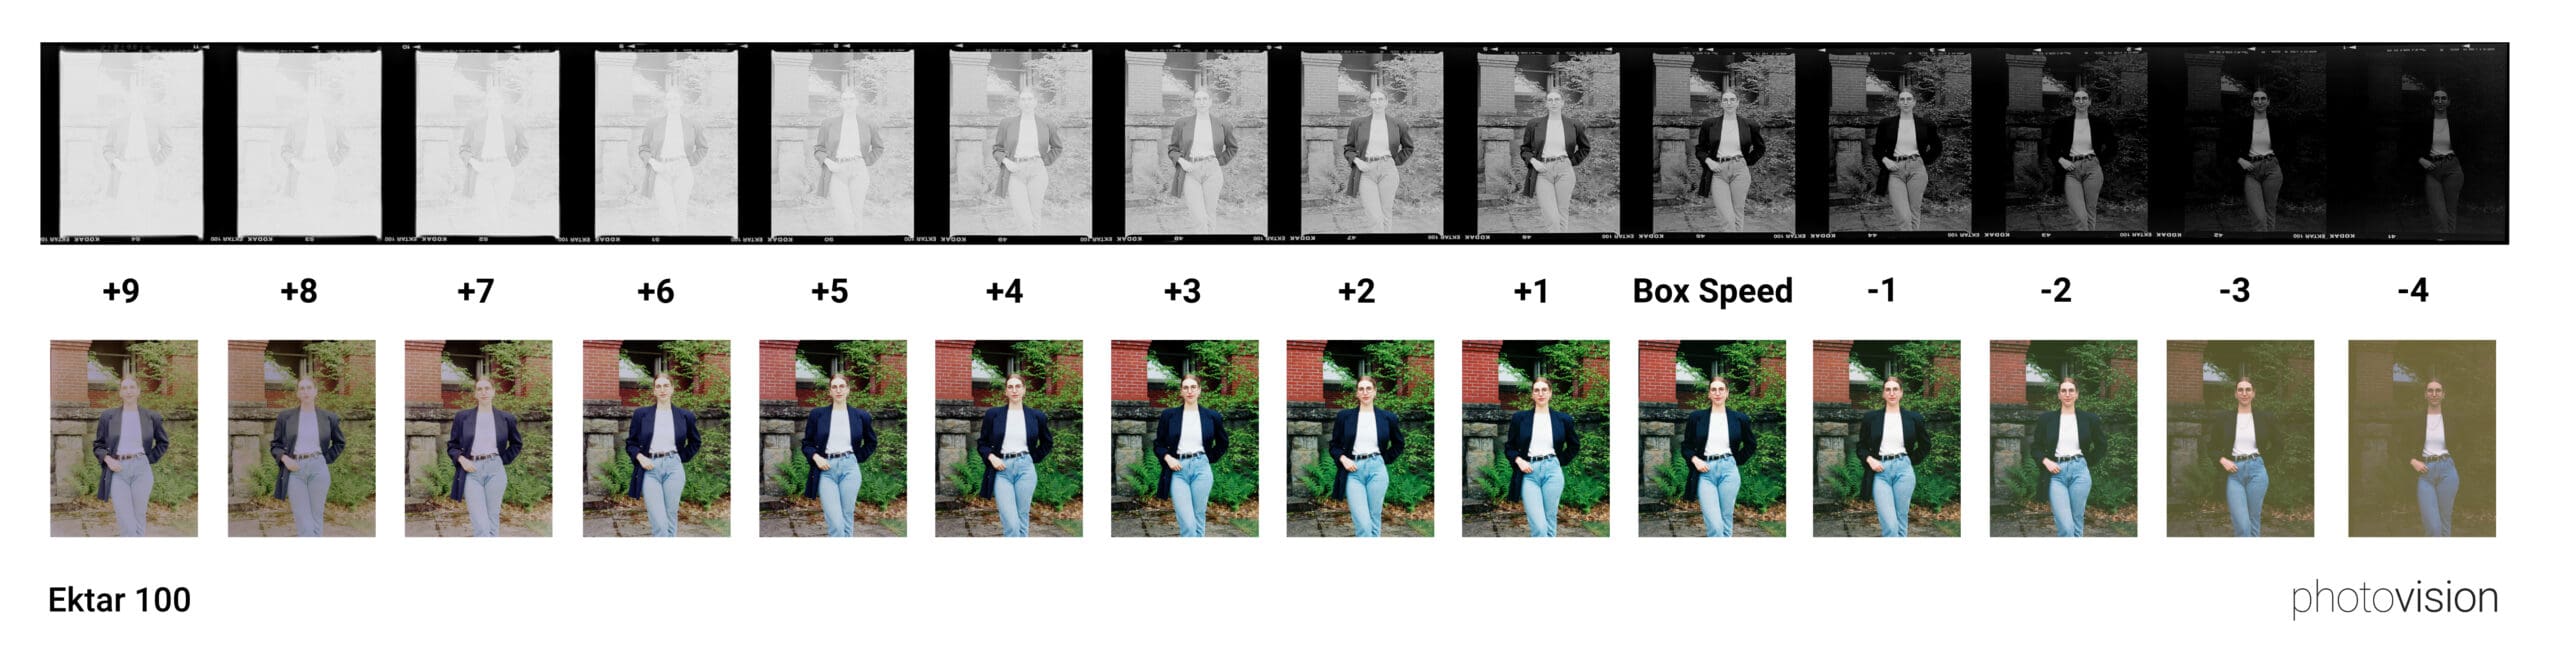
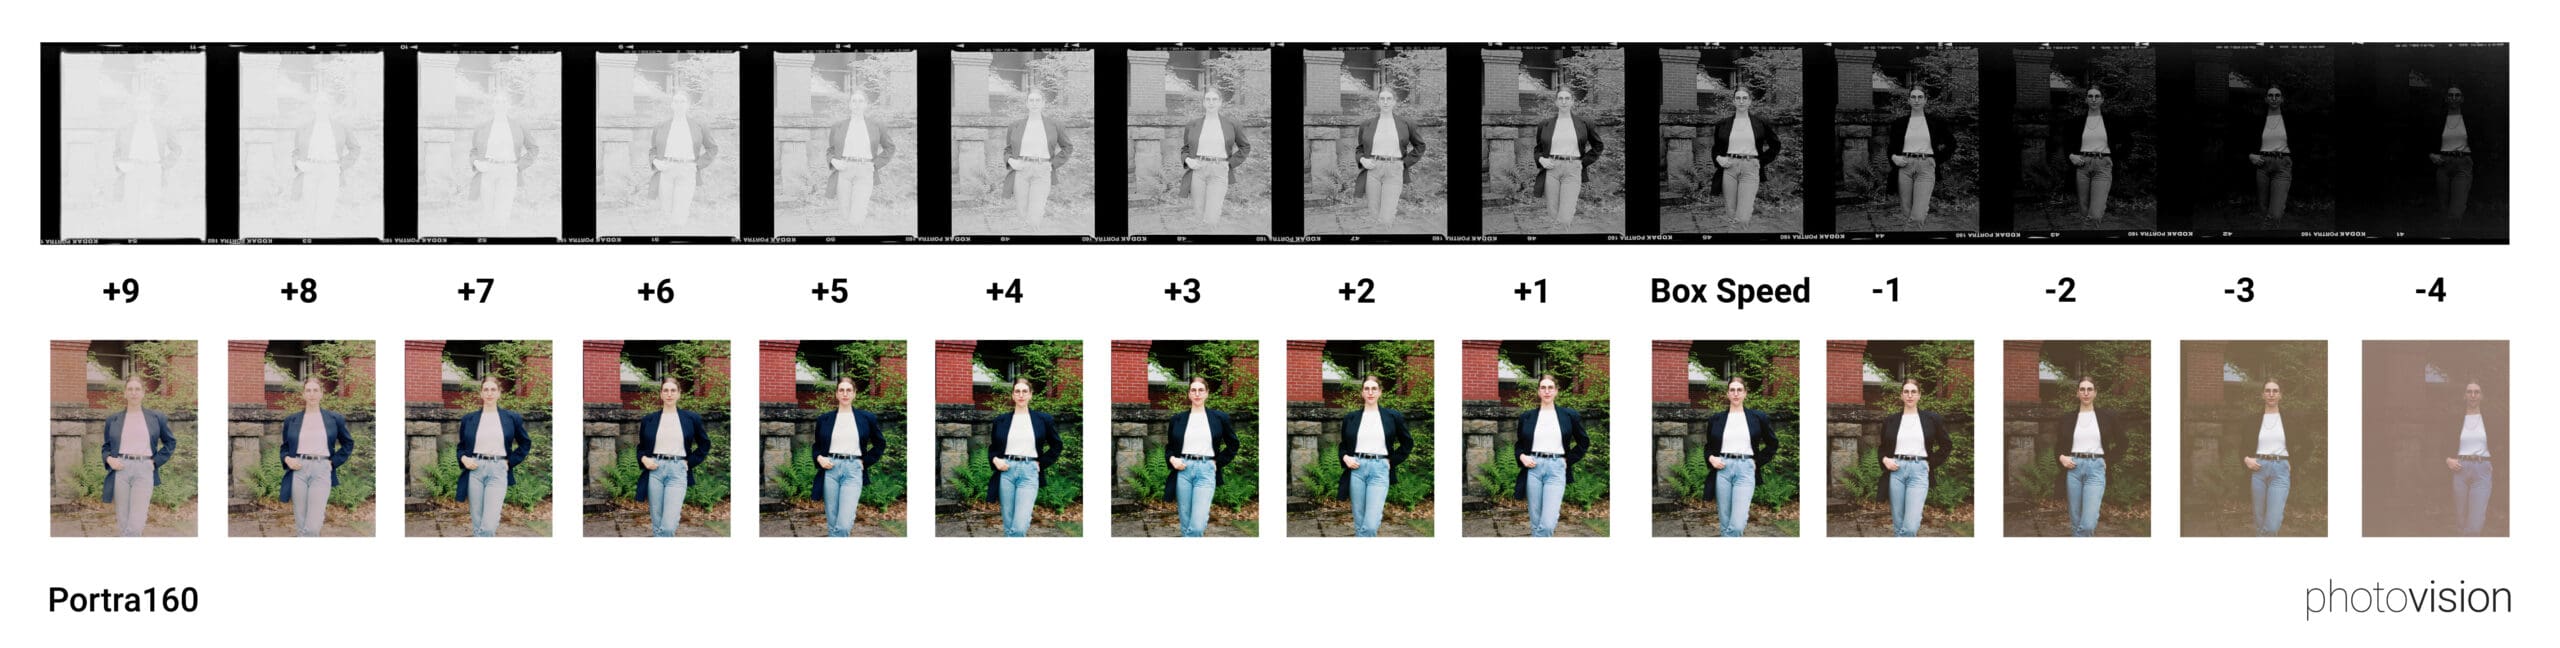
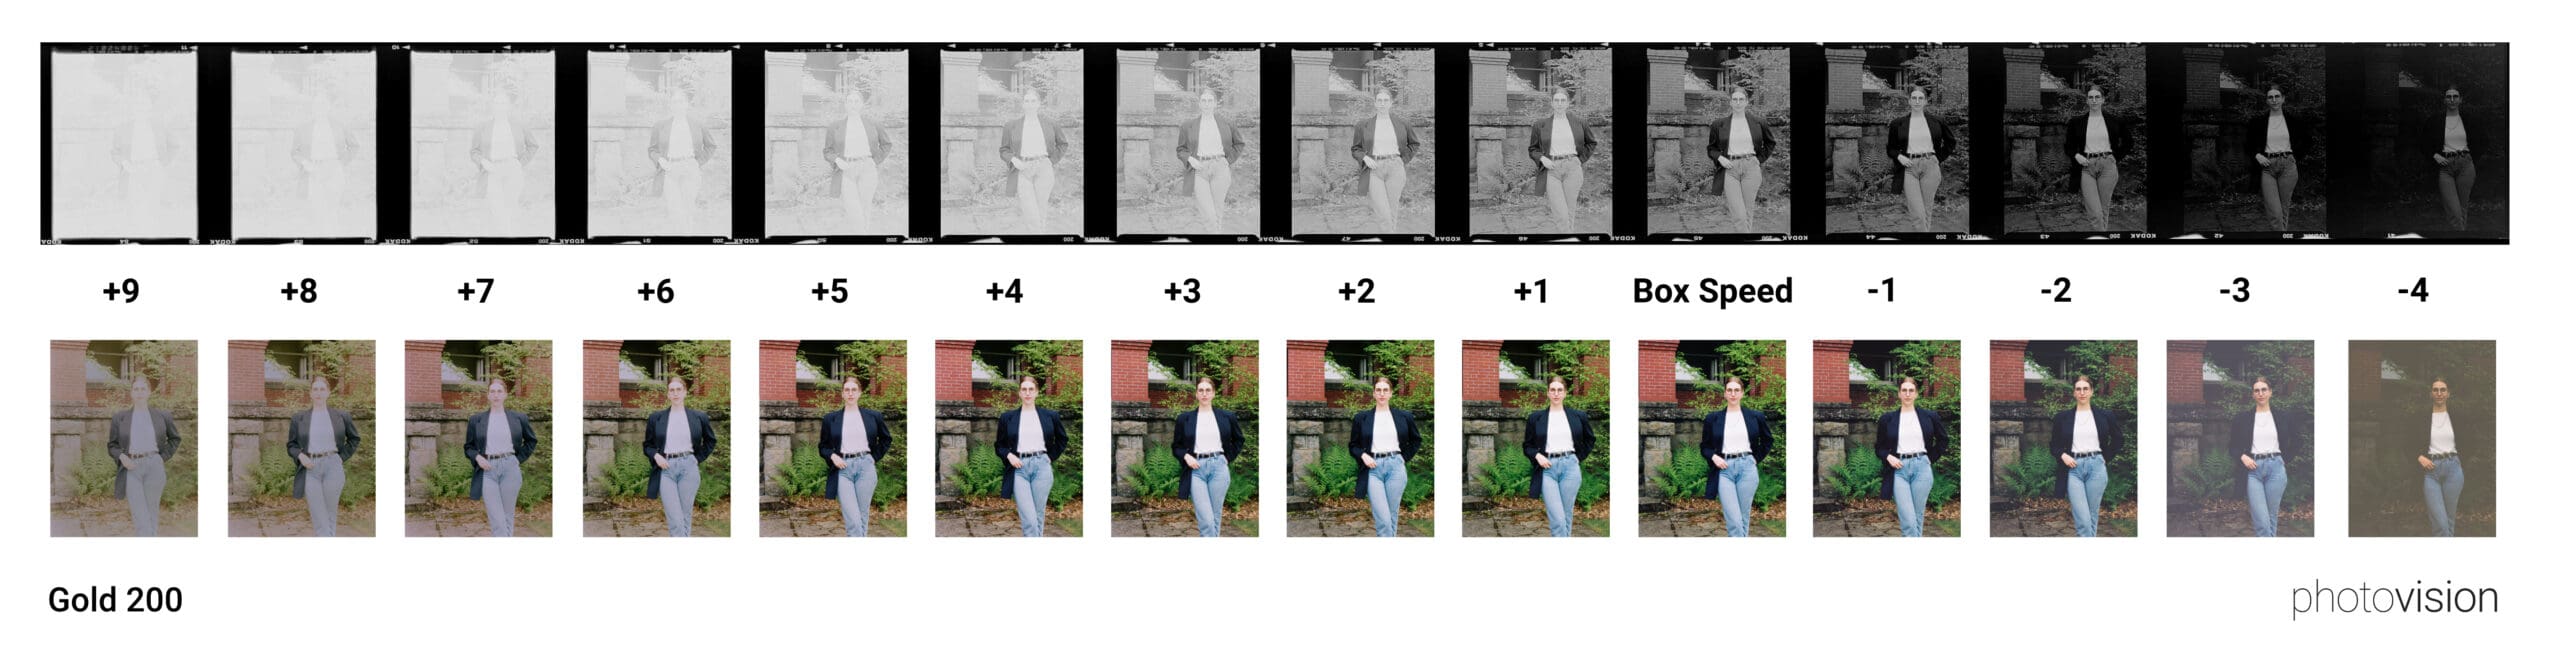
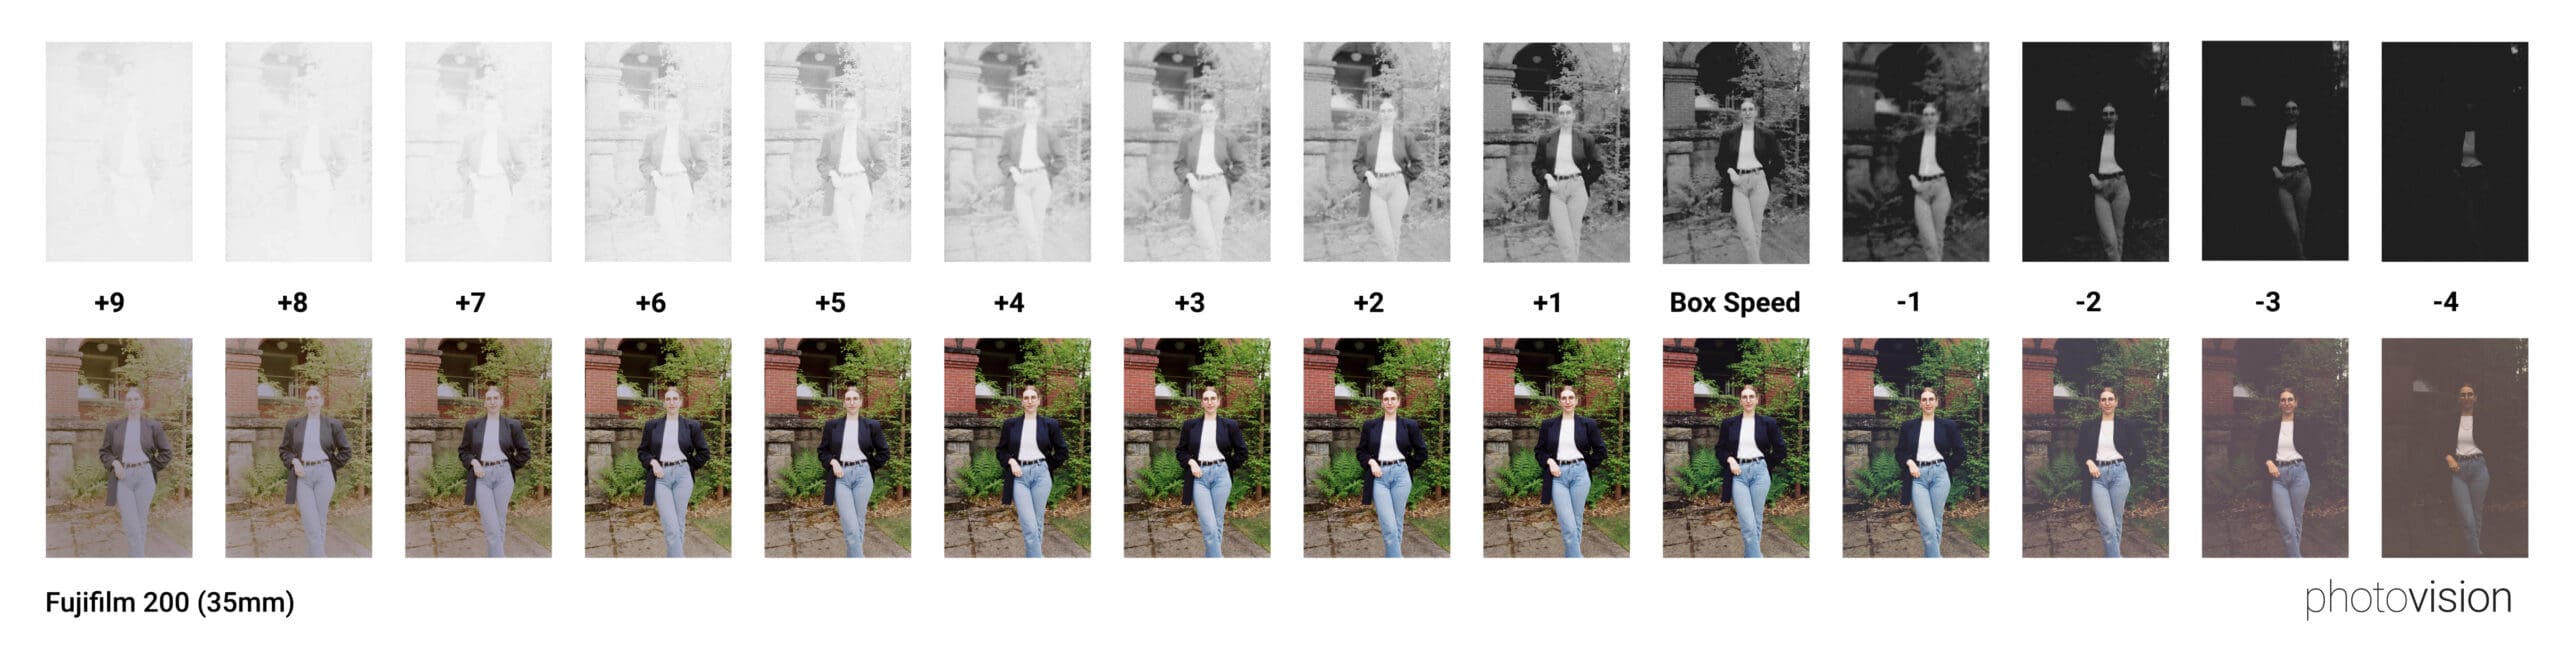
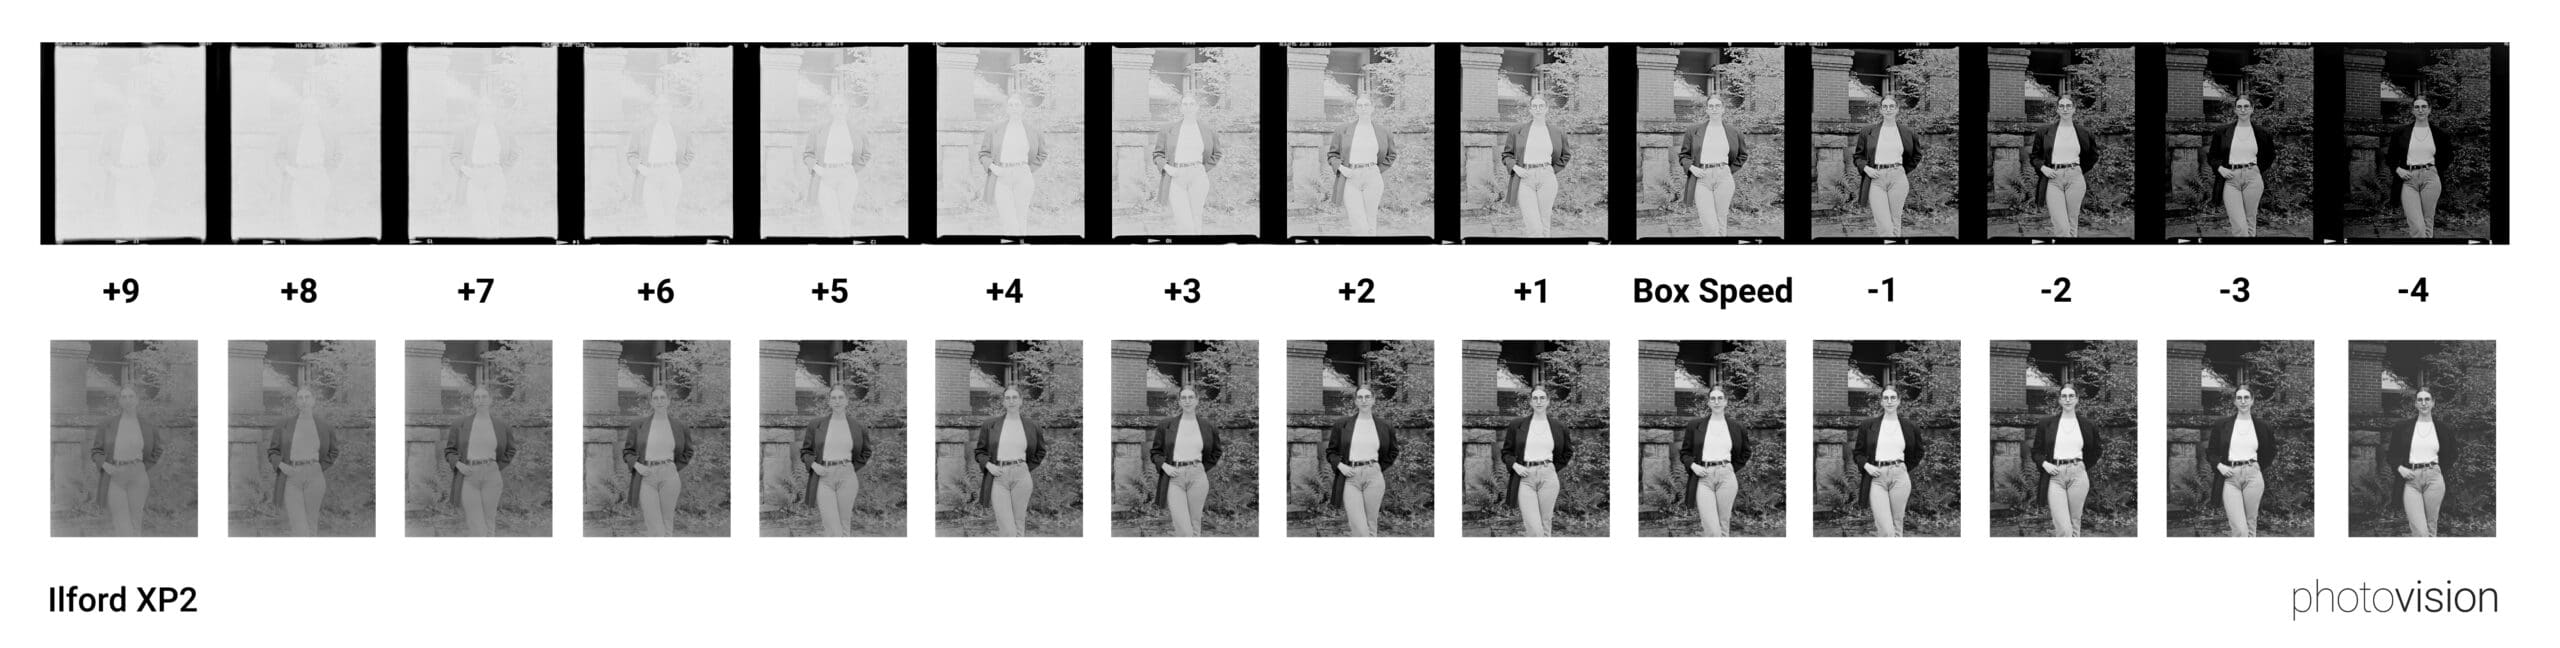
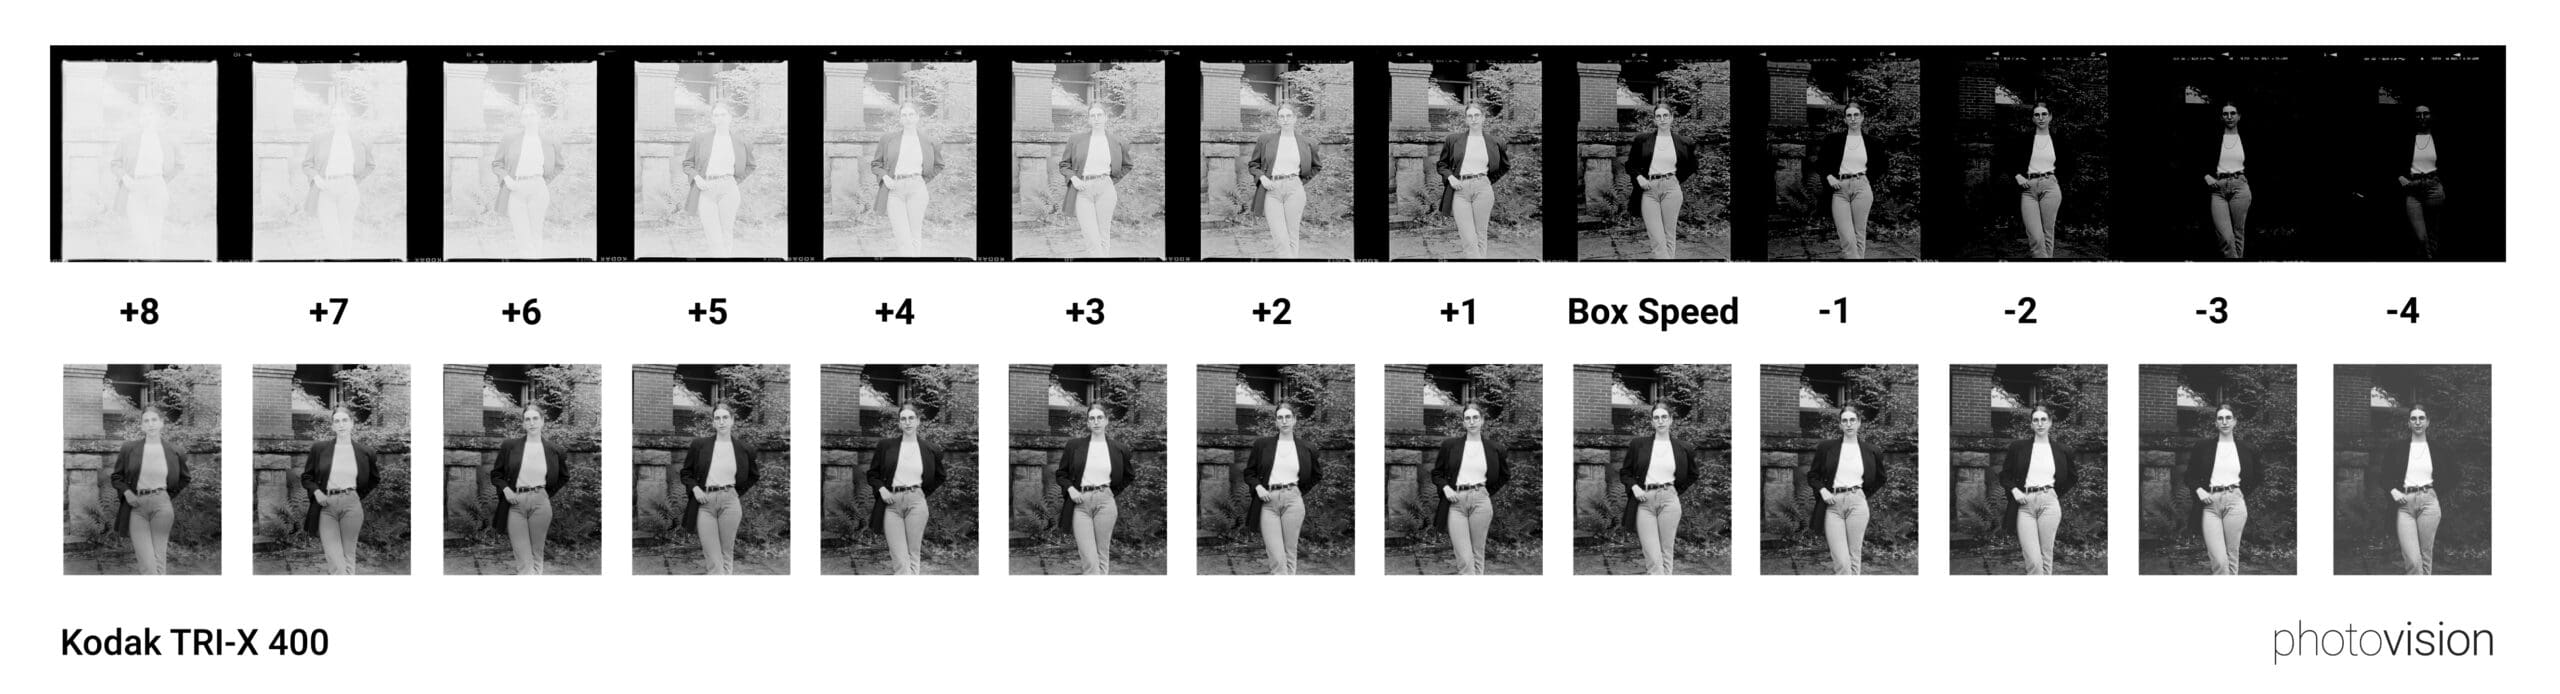
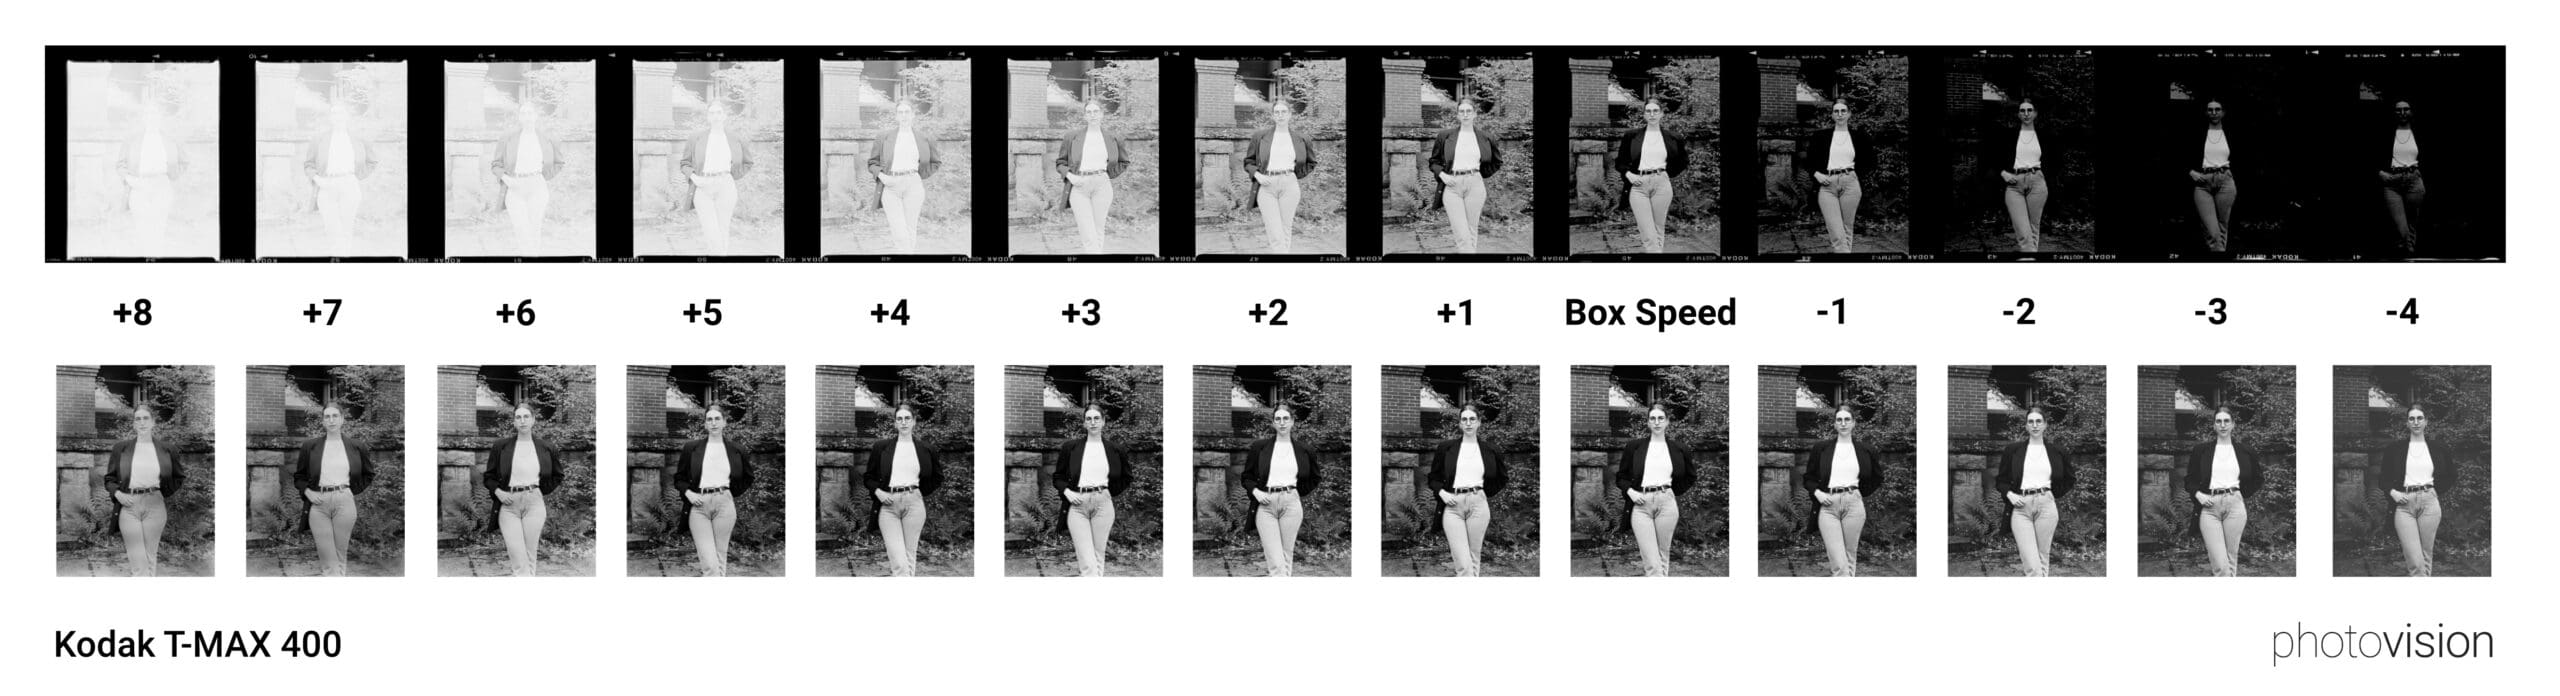
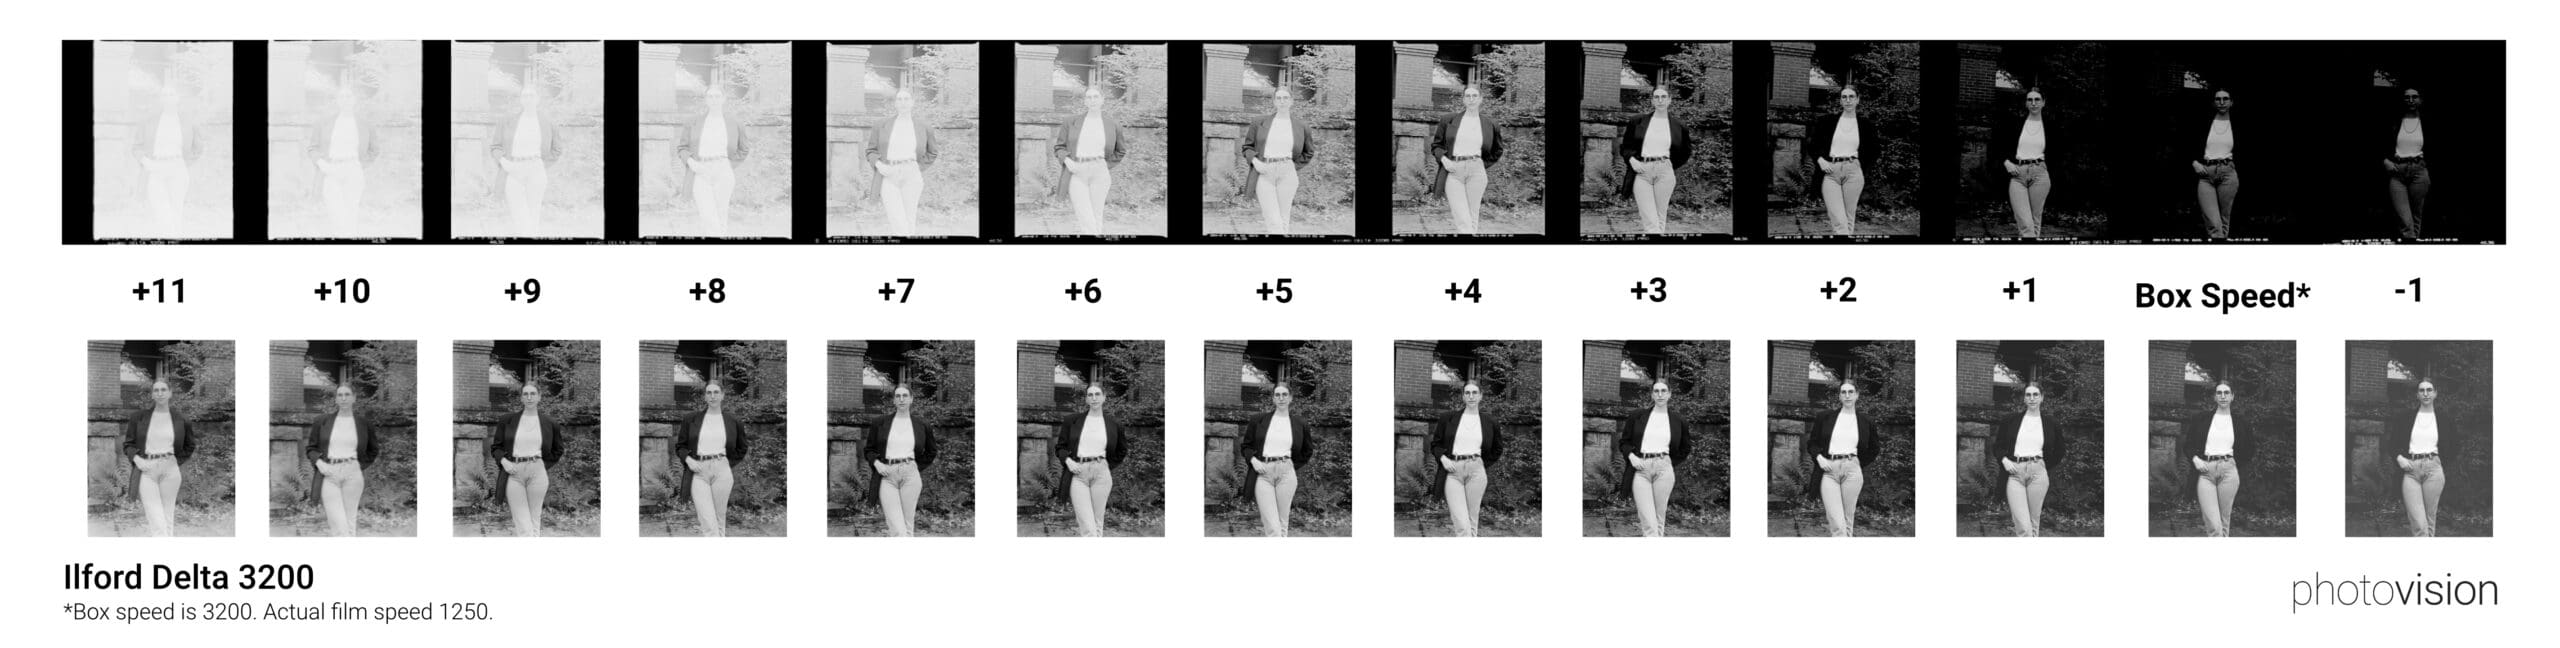
Exposure Ramp Guides
These ramps were all shot in Salem, Oregon on an overcast day in open shade. Click each guide to enlarge and then right click to save. To gain results tailored to your own shooting environment, grab a friend and make a ramp of your own.
Click any of the guides below to view them larger.